Bread (Sourdough) Starter. Check Out Sourdough Starter Crock On eBay. Fill Your Cart With Color Today! Whether it conjures up a crusty, flavorful loaf of bread or a bubbling crock of flour/water starter, sourdough is a treasured part of many bakers' kitchens.
According to all people, cooking is indeed things which is quite easy. Besides they are indeed happy cooking and have will cooking that is very good, they are also smart in mixing each dish so that it becomes food delectable. But there are those who cannot be able to cook, so they must learn and see recipes that are easy to follow.
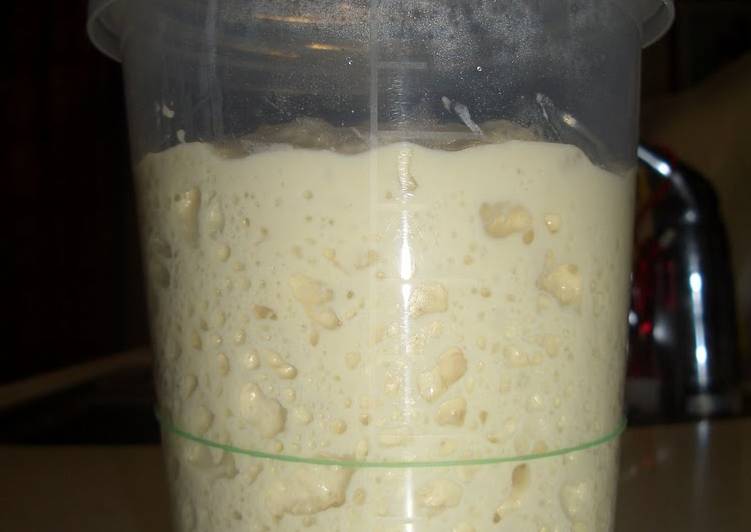 Sourdough baking is as much art as science.
Sourdough Starter is often referred to as 'wild' yeast, made from flour, water and the wild yeast in the air around us.
Each day you "feed" the starter with equal amounts of fresh flour and water.
Sourdough baking is as much art as science.
Sourdough Starter is often referred to as 'wild' yeast, made from flour, water and the wild yeast in the air around us.
Each day you "feed" the starter with equal amounts of fresh flour and water.
You can cook Bread (Sourdough) Starter use 11 ingredients and 11 the steps. Here guides how you make it.
The main ingredient Bread (Sourdough) Starter as follows:
- Prepare of ◆Sponge 1.
- Provide 50 grams of Starter liquid.
- Prepare 50 grams of Bread flour.
- You need of ◆Sponge 2.
- Provide 1 of the whole amount Sponge 1.
- Prepare 50 grams of Starter liquid.
- Provide 50 grams of Bread flour.
- Prepare of ◆Sponge 3.
- Prepare 1 of the whole amount Sponge 2.
- Prepare 50 grams of Starter liquid.
- Prepare 50 grams of Bread flour.
As the wild yeast grows stronger, the starter will become more frothy and sour-smelling. This was my first successful sourdough starter! This is your basic Sour Dough bread starter to be used over and over again. Look for the sour dough bread recipe to make use of this starter.
How to Make Bread (Sourdough) Starter
- Day 1: Make Sponge 1 by combining the starter liquid and flour. Mix together lightly, and mark the liquid level with a rubber band. The liquid can be a bit floury..
- Leave in a warm place for 8 to 12 hours to ferment..
- When the sponge has doubled in volume and there are air bubbles in the bottom, it's done. Rest for 12 hours in the refrigerator..
- Day 2: Add the entire amount of Sponge 1 that was made in Step 3 with the Sponge 2 starter liquid and flour, mix lightly, and mark the liquid level with a rubber band..
- Leave in a warm place for 8 to 12 hours to ferment..
- When the sponge has doubled in volume and there are air bubbles in the bottom, it's done. Rest for 12 hours in the refrigerator..
- Day 3: Add the entire amount of Sponge 2 that was made in Step 6 with the Sponge 3 starter liquid and flour, mix lightly, and mark the liquid level with a rubber band..
- Leave in a warm place for 8 to 12 hours to ferment..
- When the sponge has doubled in volume and there are air bubbles in the bottom, it's done. Rest for 12 hours in the refrigerator..
- Use the completed starter sponge to make delicious bread or waffles..
- Use up the starter sponge within 2 weeks. If the sponge loses its oomph, use in pizza dough or waffle batter..
Be sure that you clean the jar well before putting the saved starter. Cover top tightly with a cloth or paper towel, secured with a rubber band. Or you can stash your starter in the fridge once it's established and bake from it once a week. This Simple Sourdough Bread recipe takes a little patience to let the dough rise a couple of times before baking it. But, if you were patient enough to get your sourdough starter ready to go, then a few hours is nothing!